Thursday 31 May 2018

Red Bird

I finished punching the Red Bird project.
While at Jen1's yesterday I decided to outline the stems and leaves with the dark brown after all.  I think it really made them 'pop'.
I love the tonal Valdani threads I used for this project. They give the large areas such depth of colour. My brain is already swirling with ideas for other projects. Something like this, perhaps?
Northern Lake - Lawren Harris
Mount Lefroy - Lawren Harris

Pine Tree and Red House - Lawren Harris
Ice House, Coldwell, Lake Superior - Lawren Harris


Polwarth/Silk

I finished spinning and plying the Dragonfly Fiber roving that I've been working on for the past few weeks on Tuesday nights. It is 107g/3.8oz and 294m/322yd. I could have chain-plied it to avoid the 'barber poling' but wanted a 2 ply and corresponding yardage.
I saw lots of lovely fibre on the weekend at the Prince Edward County Fibre Festival but already have TONS of rovings in my stash. I exercised self-restraint, for once.

My spinning will probably never be really consistent. I don't really work on consistency, rather, I just spend the 2 hours a week on it and like to get projects done, rather than done to perfection.

One of these days I'll knit something with some of my handspun. Or not.

Tuesday 29 May 2018

Body of Christ? A Random Post

One of my favourite Mexican sweet treats is cajeta (pronounced ca-HAY-ta) --- carmelized sweetened condensed goat's milk. It can also be made with cow's milk. You might know it as dulce de leche. It's easy to make at home. Simply immerse an unopened can of sweetened condensed milk (like Eagle Brand) in a pot of water. Cover with 1" - 2" of water and bring to a boil. Turn it to low and simmer it for about an hour and a half. Top up with water if the top of the can is near exposure. Turn the can over and simmer for another hour or two. The longer, the darker the result. Let it cool. The substance carmelizes and makes a wonderful candy. At the bottom of the linked article are instructions for making it in the crock pot/slow cooker or pressure cooker.

 It is sold in a jar but also in little patties called obleas - wafers.
The two 'wafers' contain the little, bite-sized blob of cajeta and are individually wrapped. What are the wafers, you ask? They're unconsecrated communion wafers or 'host'. Some know it as the 'Body of Christ'. In fact some people call it BOC candy. Although sometimes the cajeta oozes out the sides, the wafers minimize the stickiness. Sometimes one even gets one with double wafers.
Although made in Mexico, it's readily available where I make my winter home in south Texas.

Communion wafers. Who knew?

Red Bird Modification

I'm really enjoying this punch needle project. This is quite a large project - 15cm x 23cm (6" x 9") but with a little time and persistence, it moves along pretty quickly.
I'm really happy I added a crest to the 'red bird'. As a birder, I am more comfortable with it looking cardinal-like.
I am hoping I'll have enough of the lighter blue colour to finish the sky. Then there's the whole foreground to be done with brown. I may mix the two brown colours.

Outlining the sunflowers really made them 'pop'. If I were to do this pattern again, I'd outline the stem and leaves as well. This photo is an attempt to show the two loop levels in the centre of the sunflowers. This is easily achieved with the Ultra-Punch (aka Cameo Punch needle) by changing depth levels.
I haven't decided how I'll finish the piece - what I'll back it with, how I'll mount it, etc.
I'm leaning more and more to taking up rug hooking. Hooked on the Lake sells whole rug-hooking kits including the backing fabric with the pattern drawn on it and the strips of fabric that are colour coded to the project. This is perfect for me, who spends so much time dithering about what colours to use. My hope is that rug-hooking won't take much storage space in my ample, yet fibre-stuffed home.

Also, these hand-dyed Valdani threads are a pleasure to work with. The give the piece such dimension.

Monday 28 May 2018

2nd Annual Prince Edward County Fibre Festival

Jen, Trish, Terry, Barb, and I carpooled to the PEC Fibre Festival on Saturday. For being its only second year, it appeared to be really well attended. We split up and agreed to meet at noon. I did tour around the arena a couple of times and the vendors out the back. There, I purchased an heirloom tomato plant called 'Purple Calabash'. I wanted to try at least one variety of heirloom tomato this year. Skip has planted it in a really good, sunny, protected spot. Hopefully it will do well there.

I never did make it back to the barns where, unbeknownst to me, former student, longtime friend, and new alpaca farmer, Cathy Musselman was located. We do need to catch up on what's gone on in our lives the past 33 years so I do plan to visit her farm, Silver Birch Alpacas, in the near future. Jen, Barb, and I also hope to stop in there on our way to our knitting retreat in November.

But I digress...

At the Hooked on the Lake booth, punch needle kits were being sold. I finally decided on the Red Bird kit designed by Karla Gerard.
It came with the 8 Valdani thread colours

and the weaver's cloth with the design drawn on it.

I already owned the punch needle and threader which I've used for a couple of other projects. I like the Ultra-Punch because the loop sizes are easily adjusted. I am using #3 for the project and #5 for parts of the centre of the sunflowers. The proprietor, Loretta Moore, explained that this medium size with #8 perle cotton threads or 3 plies of floss is used almost exclusively as the small size that uses only one ply is too tedious, and the large size that accommodates 6 plies of floss or #5 threads damages the fabric too much. Weaver's cloth is a cotton/polyester blend. It allows the fabric to 'mend' around the thread. Pure cotton would just shred without the polyester to give it strength.
The drawn design looks like the photo, however, punching is done from the back
so the image on the front will be the mirror image. Note to self, always transfer the design onto the fabric flipped on the vertical axis to yield the right orientation, especially if there is text.

The Valdani threads are beautifully hand dyed so there is lots of depth to the colours. For the sky, I'm blending the two blues as the design moves from one corner downwards. I'm really liking the result.
I punched the sunflower, stem and leaves quite densely. I'm not doing the sky quite as densely - it won't take me as long and I'm concerned I'll run out of thread otherwise. There are no stitchery stores nearby where I could purchase more Valdani thread.
I have also decided to put a crest on the red bird to make it more cardinal-like.

When I googled 
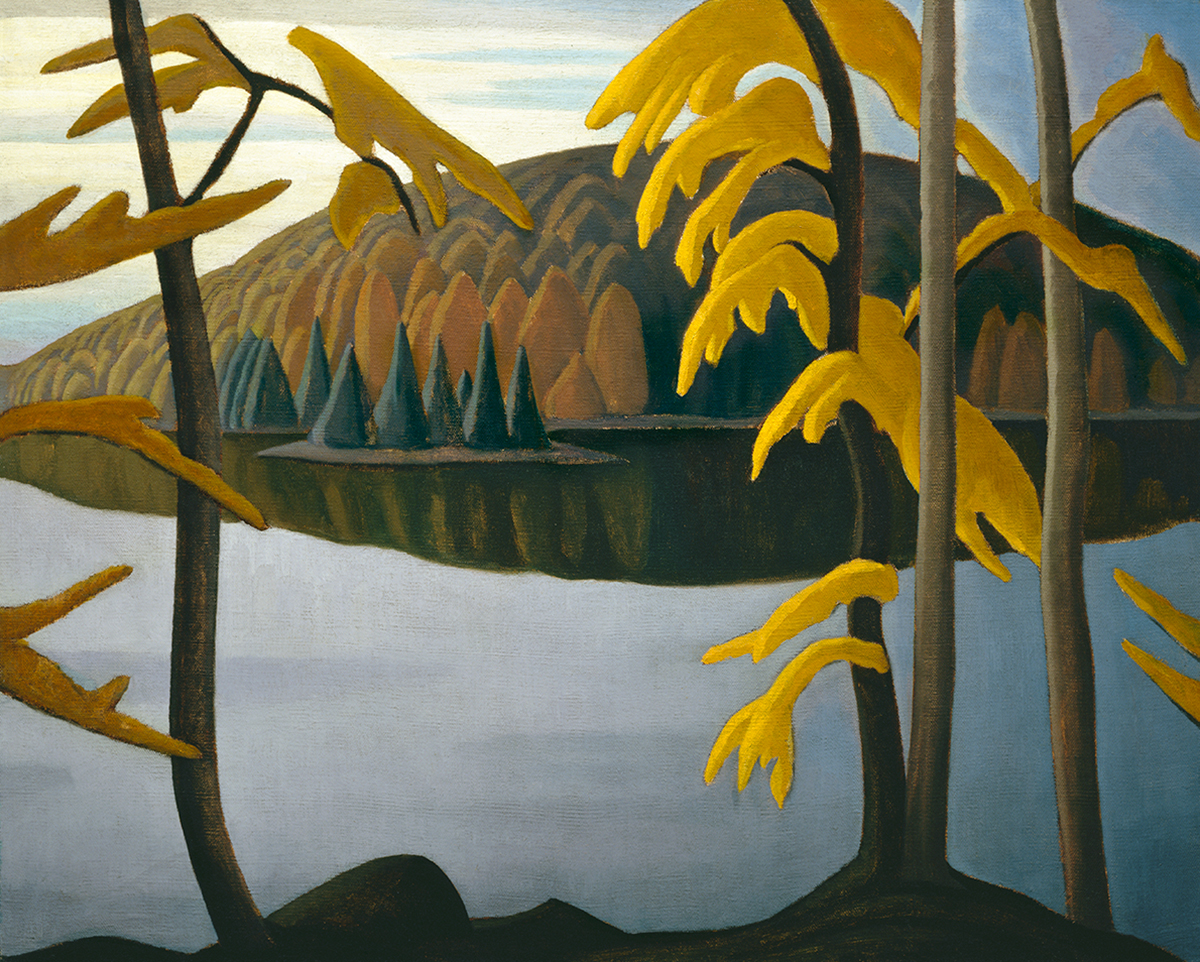
the designer, Karla Gerard, I found lots of her whimsical designs that lend themselves to this technique. Then I realized a lot of Group of Seven paintings would, too. What do you think?


I finished a little baby cardigan I knit for my friends' granddaughter, due in September. I have knit this pattern, top-down Maile cardigan, at least 3 other times.
 Buttons need to be purchased.  I might even have enough yarn to knit a little hat as well.
The yarn is some acrylic I had on hand - easy care for the new mom. However, I'd like to knit something else with some superwash merino - perhaps a yoked cardigan with little sheep on the yoke?

Friday 25 May 2018

Another Cuddle Quilt

My friend's daughter is expecting a child so I wanted to make a cuddle quilt to give them.

I haven't been able to find the really fuzzy stuff I made this quilt out of.
So I've settled on Cuddlicious dimple fabric. Again I agonized over the selection of the flannelette fabric but I came up with something I'm happy with and I hope the mom will be, too.

The cuddle fabric comes in 150cm (60") widths. I used a 75cm (30") square for this one so have enough for another one. I'll check out other fabric stores for other flannelette patterns. A meter of fabric is perfect for the flannelette as this pattern calls for a 100cm (40") flannelette square.
The child is a little girl but I stayed away from excessive pink fabrics as some people try to avoid gender stereotypes.
I used this tutorial which is a bit different than the one I had previously used.  Previously, I had made the mitered corners on the flannelette and tucked the cuddle fabric into the 'frame'. This time, I stitched the cuddle fabric to the flannelette and mitered the corners after. Here's a video showing the process. Truth be told, I think it turns out better when the corners are mitered first. This video shows that way.

Once everything was right side out, I stitched all the way around with a somewhat decorative stitch - kind of an elongated, multi-stitch zig-zag.
I'm a real sucker for cute little animal prints. Both sides are useful and decorative.
Now that I have my deck furniture out, I can take photos in indirect light.
To bind the two fabrics together in the centre, I stitched a big 'X' from opposite corners. I used low tack masking tape as a stitching guide.
I always pre-wash flanellette and rip along the weft to get accurate dimensions. I also ironed it before starting to sew it. The cuddle fabric is synthetic so can be washed and tumble-dried, like the flannelette, but cannot be ironed. It should get fluffier with washing.
I'm going to keep an eye out for other fabric to go with the other square of dimpled, cuddle fabric.

Wednesday 23 May 2018

Grime Guards

Today I sat down and cranked out some grime guards - elasticized fabric covers for Q-Snap embroidery frames.
Grime guards for 11", 8", and 6"
I've been wanting to make sets of these for a while. I had bought the 1/4" elastic and was just dithering about what fabric I'd use. While rummaging around in one of my fabric cupboards, I found this fabric that in a previous life had been a valance over a window in my family room. It was in perfect condition - not faded at all, and perfect for this project.
I used the dimensions and information from this post from the Thread-Bare blog. Commercially, they're between $9 and $12 each. With this reclaimed fabric and a couple of packages of 1/4" elastic, I have a complete set for a couple of dollars.

The fabric wraps around the project mounted on the Q-Snap frame. Excess fabric can be tucked in to keep things neat and out of the way for stitching.

This is the back of a project.
Basically, measure one side of the frame. Multiply by 4 and add a couple of inches. For an 8" frame, that would be 4 x 8" + 2 = 34".  That will be the length of  your fabric strip. For extra coverage, cut the piece 8" wide. Sew the strip ends together to create a loop.  The elastic is the length of two sides plus 2". For the 8" frame, that's 2 x 8" + 2 = 18". Run through a channel sewn on each long side. Easy peasy.

I have LOTS more fabric to make more sets. I just need to get some more elastic.

High-Fiving Cats

I finished another dumpling bag - this time, 25% larger than the original one. The cats are high-fiving.
At this angle they look almost the same size.
This is the real difference in sized among the three of them.
 It opens wide like the other two.


Monday 21 May 2018

What I've Been Watching...

I get a lot of stitching and knitting done whilst watching TV. Between a PVR and Netflix, I mostly watch things that really interest me rather than just programs to fill the time.

I record a lot of documentaries from CBC (Canadian Broadcasting Company), TVO (Ontario public television network) and BBC. I also watch documentaries on Netflix as well as TV series - present and past.

Lately I've been watching Jerry Seinfeld's "Comedians in Cars Getting Coffee". I have been laughing out loud at several of them - highlighting the greatest living comedians of our time. In some episodes (about 20 min long), they are in awe of Jerry Seinfeld and appear almost star-struck. In other episodes he is interviewing comedians that were his role models - Don Rickles, Mel Brooks, Carl Reiner - the series originally aired two years ago and since that time Don Rickles has died. Sometimes the cars are amazing. Other times, they break down. It's a pretty funny series.

I like foreign series as well, particularly Scandinavian ones like 'Dicte' (about a journalist who returns to her hometown from the big city) and 'Rita' (about a very competent school teacher whose personal life is a mess). However, it's hard to do embroidery or stitching whilst watching a foreign film with English subtitles.

Other Netflix shows I've enjoyed:

  • The Crown - starting with Elizabeth IIs early years
  • The Making of a Murderer - Michigan murder documentary
  • The Keepers - documentary about a nun's murder in Baltimore
  • My Next Guest Needs No Introduction - David Letterman et al
  • I Am the Ambassador - two years of American ambassador to Denmark - I first watched this on TVO
  • Dirty Money - investigation documentary
  • House of Cards - watch it soon before it disappears because of the Kevin Spacey sexual abuse scandal
  • The Final Year - Obama's last year in office
There are lots of British mystery series that intrigue me as well as full BBC series that have previously aired on PBS.

There is so much crap on TV but if one looks carefully, many informative, entertaining shows are there. 


Dumpling Dish

I have wanted to make another Dumpling Dish for a while. The original pattern is the last 45 (!) pages of the Bionic Gear Bag (BGB) pattern. The BGB pattern is for sale on Craftsy as well as the Sew Like a Rock Star website. The entire pattern is 82 pages long.

There are lots of photos of the various steps involved in making the two projects. However, the designer includes a rambling monologue and 'stream of consciousness' text which makes it tricky trying to isolate the important parts - the steps in sewing. It would be terrific if she just wrote the pattern like a normal sewing pattern and included a video instead of the rambling, annoying text.

That being said, I did have success putting this project together.

First, I printed the last page of the pattern which is the pattern piece. I then blew it up by 50% as I wanted it to be a larger dish than the first one I did.
Then it took me a while to find the fabrics I wanted to use - same colourways - contrasting design.

 The shape is that of a dumpling.
When unzipped, it forms a bowl shape.

I use my smaller one for my sewing clips.
To make it open completely, the zipper extends beyond the edge of the 'dish'. It is trimmed and a patch of fabric is sewn to the outside anchoring the end of the zipper.
The other side opens completely. I'm pretty proud of the job I did to get the two sides to line up.  The top-stitching is done at the end and gives it a nice, finished look.
The fabric can be 'fussy cut' to best show off the fabric pattern. As the pattern piece is placed on the fold, I made sure the kitty cat was on the fold as well so it would be the centre, once unfolded.

This fabric has the cats going 'every which-way' so I wanted to make sure the prominent one was right-side up.
I usually like the linings to be a lighter colour so the contents can be easily seen.
The dumpling dish is an excellent pattern for zipped containers where the entire contents need to be easily seen. One of these days I'll tackle the full-sized BGB. I have made a couple of the baby BGBs which are smaller versions with one pocket.

The next dumpling dish I make will only be 25% larger than the pattern calls for.