It has been a busy week. It was Scooter's birthday on Monday and Skip's on Tuesday. Skip and I spent Sunday and Monday nights in The Big City. The first night was with a Groupon deal that I found at the Delta Chelsea. We were underwhelmed. It is a nice hotel but the room was no better than one we'd find at a Quality Inn and they charge $13.95 for WiFi! I hate it when expensive hotels nickel and dime me. I'm glad I didn't have to pay full price.
The next night I booked us into the Hotel Victoria on Yonge St. between Wellington and King. It is a boutique hotel over 100 years old. It was lovely. Our room was urban chic with FREE WIFI!! Yay! And we were given breakfast vouchers totalling $24 with adequately covered our morning nutritional needs. Because we were in the city, we met Scooter for his birthday dinner in the neighbourhood where he lives with his mother. We had a very nice time at his favourite restaurant, Queen's Pasta.
I also spent a couple of hours at Romni Wools and bought some red and white Lanett yarn to make a Christmas gift for our Christmas Eve party hostess, some Rios for a friend to give to her daughter who knits, some understated sock yarn for me
and some Fleece Artist Woolie Silk 3ply that matches the Malabrigo sock yarn with which I'm knitting my Maia Shawl. My plan is to knit some handwarmers for myself.
Skip and I also poked around the Eaton Centre. I really liked the enormous reindeer sculptures.
In this closeup, you can see the lights wrapped around the curly metal frame and the many colours of stars hanging inside the body.
I also like to take photos of the Swarovski tree with its more than 44,000 crystal ornaments. This photo does not do it justice.
We returned home on Tuesday afternoon and had a nap!
Wednesday I knit with my 'peeps' in the afternoon and Thursday I met with my monthly knitting group at the tea shop for lunch. I skipped my knitting group that night to do some more crafting. I made a couple more reversible project bags. This one isn't very colourful but it has a ewe and a lamb on it.
I decided to go with the companion fabric for the other side.
I really liked this multicoloured yellow fabric
and found striking taffeta fabric to coordinate.
Today, I made 4 sets of stitch markers using 9mm jump rings.
I finished two commissioned pieces. One was a shawl that just needed casting off, the border knit and attached and the whole thing blocked. The other involved knitting the remaining 80% of a lace scarf and blocking it.
I have Joseph's capybara scarf and the Nordic Christmas ornament to finish. 7 days and counting...
Sunday, 18 December 2011
Friday, 9 December 2011
Being Multicraftual
I like to do lots of crafty things. Of course, my favourite of all is knitting but I also enjoy cross-stitching, needlepoint, I dabble in crocheting and drawing pysanky (Ukrainian Easter eggs). I also can sew. I don't do a lot of sewing but have done some quilt piecing and machine quilting. My sewing machine is a very basic White which I purchased used in 1973 and have only had to have it repaired once in all that time. It sews forward, in reverse and has a zigzag feature. It weighs a ton. I think it's because it's made of cast iron or some other very heavy metal. I does what I need it to do - the little sewing that I ever do now.
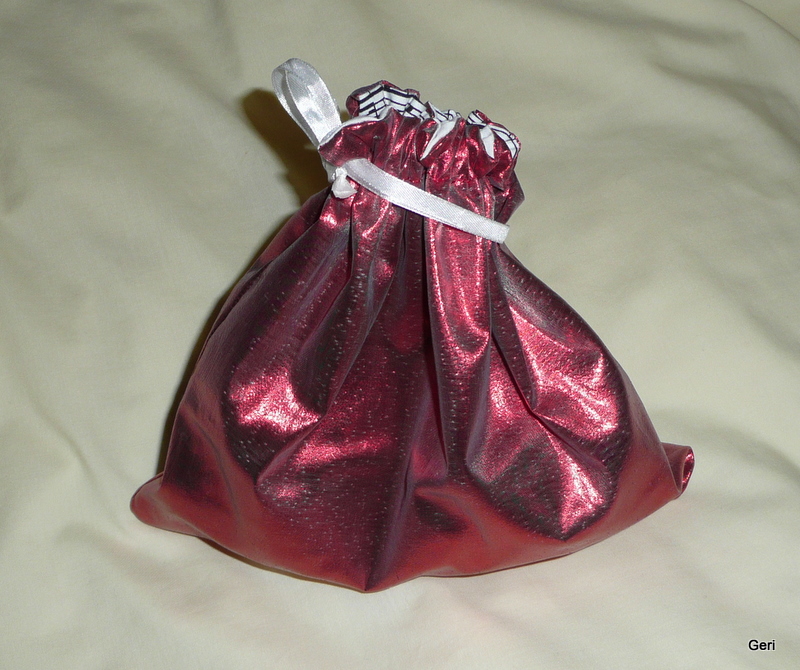
Last week at my Thursday night knitting group, one of the participants had a lovely Lantern Moon project bag. It was silk taffeta and I really liked the look of it. I figured I could certainly make project bags with a nice, shiny fabric, too. So yesterday I headed to the fabric store and bought some black and white, music-themed cotton fabric and some red taffeta fabric.
I wanted to make drawstring bags that were completely reversible.
I figured I'd find a pattern somewhere on the Internet and found this one that had a good explanation of how to do a lined bag in such a way that it can be reversible. I didn't necessarily need mine to have a flat bottom or a gusset. I even had the right colours of thread in my sewing box! A couple of hours later I had two done.
And reversed...
If I make more, (I bought enough fabric to make several more), I will make them with little gussets so they'll have a flat bottom and will stand up easily like this. Hmm, an unlined one would make great wine bottle bags for the festive season. (making mental note of this...)
After I finished the bags, I took a closer look at the printed fabric. It looks like they just printed a piano keyboard over the music staves. It looks a bit confusing but OK in small doses.
On closer inspection, I realized the music is actually the notes for "The Last Post" which is played on Remembrance Day. I wonder how it was decided to pick that particular piece of music - one played on solo bugle - to accompany a printed piano keyboard? Could the fabric company not have selected a public domain piano work by Chopin, Liszt or Beethoven? Just a little something that made me go, 'hmmmmm'.
Last week at my Thursday night knitting group, one of the participants had a lovely Lantern Moon project bag. It was silk taffeta and I really liked the look of it. I figured I could certainly make project bags with a nice, shiny fabric, too. So yesterday I headed to the fabric store and bought some black and white, music-themed cotton fabric and some red taffeta fabric.
I wanted to make drawstring bags that were completely reversible.
I figured I'd find a pattern somewhere on the Internet and found this one that had a good explanation of how to do a lined bag in such a way that it can be reversible. I didn't necessarily need mine to have a flat bottom or a gusset. I even had the right colours of thread in my sewing box! A couple of hours later I had two done.
And reversed...
If I make more, (I bought enough fabric to make several more), I will make them with little gussets so they'll have a flat bottom and will stand up easily like this. Hmm, an unlined one would make great wine bottle bags for the festive season. (making mental note of this...)
After I finished the bags, I took a closer look at the printed fabric. It looks like they just printed a piano keyboard over the music staves. It looks a bit confusing but OK in small doses.
On closer inspection, I realized the music is actually the notes for "The Last Post" which is played on Remembrance Day. I wonder how it was decided to pick that particular piece of music - one played on solo bugle - to accompany a printed piano keyboard? Could the fabric company not have selected a public domain piano work by Chopin, Liszt or Beethoven? Just a little something that made me go, 'hmmmmm'.
Thursday, 8 December 2011
Soap Sweater and an Update
While at the Woodstock Fleece festival in October, I purchased three Honey and Lavendar (sic) All Natural Handmade Soaps from the Pioneer Brand Honey people. They smell wonderful! I've been storing them in my linen closet since then with plans to give them as Christmas gifts.
Recently, I was browsing on Ravelry and came upon Cynthia Hall's Soap Sweaters and thought they'd be perfect for the fragrant soaps. I hauled out some Lion Brand Fisherman's Wool from my stash and in about an hour, I finished the project.
I really liked the feel of this yarn and there is excellent yardage in the 227g (8 oz.) skein - 425m (465 yd.) I'm not sure why I haven't knit more stuff with this yarn. I think it's the label that has scared me as it states it's "Perfect For Felting" and most of the items I knit aren't for felting. It would be great for an afghan that isn't likely to be mistreated or need washing very much as it definitely calls for hand-washing.
In capybara scarf news, I finally have photos of the second half of the scarf. You may remember that I knit the first half from a graph I did using regular graph paper with squares. The resulting design looked squashed. So I re-did the design on graph paper that reflected my gauge (5 sts/8 rows = 1") and knit the design of the second half.
Ta da!


They look much better now. I have about another foot of stocking stitch to knit before finishing the 2nd half. Then I'll go back to the first half and cut out the squashed capybara, pick up the stitches above the 'faux fringe' and re-knit using the revised graph, then graft it to the stocking stitch part.
When I switched to two circular needles for the stocking stitch (red sts on one and black sts on the other) I should have gone up one needle size. When I finish the knitting and grafting, I'm going to wet block the scarf and pull the sides out to the correct dimension. That should take care of the gauge issue.
Recently, I was browsing on Ravelry and came upon Cynthia Hall's Soap Sweaters and thought they'd be perfect for the fragrant soaps. I hauled out some Lion Brand Fisherman's Wool from my stash and in about an hour, I finished the project.
I really liked the feel of this yarn and there is excellent yardage in the 227g (8 oz.) skein - 425m (465 yd.) I'm not sure why I haven't knit more stuff with this yarn. I think it's the label that has scared me as it states it's "Perfect For Felting" and most of the items I knit aren't for felting. It would be great for an afghan that isn't likely to be mistreated or need washing very much as it definitely calls for hand-washing.
In capybara scarf news, I finally have photos of the second half of the scarf. You may remember that I knit the first half from a graph I did using regular graph paper with squares. The resulting design looked squashed. So I re-did the design on graph paper that reflected my gauge (5 sts/8 rows = 1") and knit the design of the second half.
Ta da!
They look much better now. I have about another foot of stocking stitch to knit before finishing the 2nd half. Then I'll go back to the first half and cut out the squashed capybara, pick up the stitches above the 'faux fringe' and re-knit using the revised graph, then graft it to the stocking stitch part.
When I switched to two circular needles for the stocking stitch (red sts on one and black sts on the other) I should have gone up one needle size. When I finish the knitting and grafting, I'm going to wet block the scarf and pull the sides out to the correct dimension. That should take care of the gauge issue.
Tuesday, 6 December 2011
Always Learning Something...
I finished the Christmas stocking.
I had to modify the nose and outline the pom pom, hat and beard with half a stitch of grey. I also cross-stitched Jon's name on it because it looked a lot better than my attempts at duplicate stitching the lettering.
The jogless stripe for the toe worked out really well. It is SO easy to do. Just knit the first round of the new colour and then slip the first stitch of the second round and continue knitting. Slipping the stitch pulls it up to the second row and just evens things out. Isn't that nifty?
I continue to work on the second half of the capybara scarf. The straight stocking stitch is going quickly. I'll probably get it done in the next few days.
Also, on the weekend Stephanie and I learned how to post one of her patterns on Ravelry. I have a couple that I want to get written up to share as well.
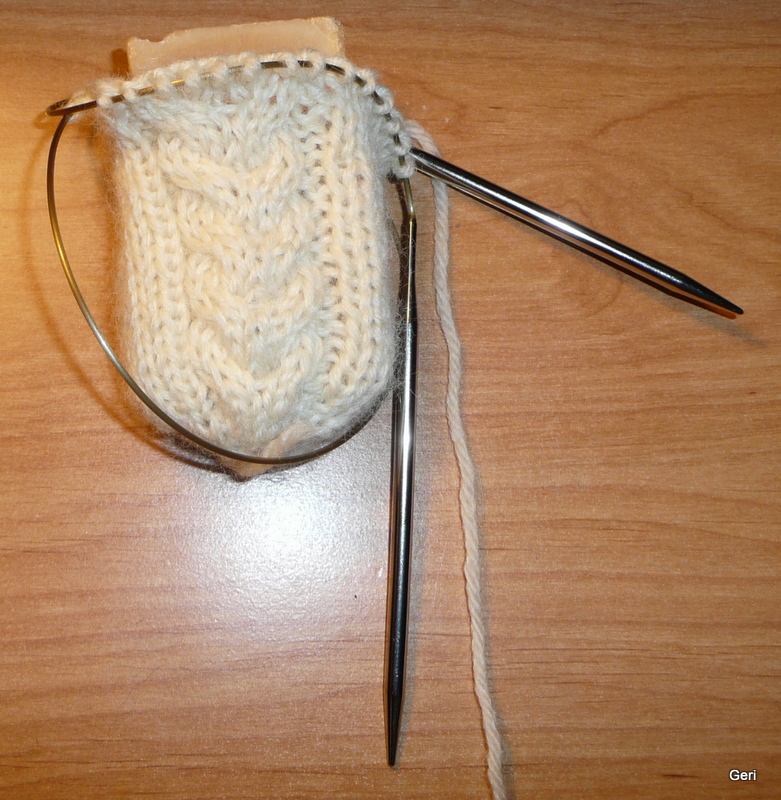
Next on my project list are a cable and lace cardigan using reclaimed worsted weight cotton/nylon blend yarn and a cable sock of my own design.
I had to modify the nose and outline the pom pom, hat and beard with half a stitch of grey. I also cross-stitched Jon's name on it because it looked a lot better than my attempts at duplicate stitching the lettering.
The jogless stripe for the toe worked out really well. It is SO easy to do. Just knit the first round of the new colour and then slip the first stitch of the second round and continue knitting. Slipping the stitch pulls it up to the second row and just evens things out. Isn't that nifty?
I continue to work on the second half of the capybara scarf. The straight stocking stitch is going quickly. I'll probably get it done in the next few days.
Also, on the weekend Stephanie and I learned how to post one of her patterns on Ravelry. I have a couple that I want to get written up to share as well.
Next on my project list are a cable and lace cardigan using reclaimed worsted weight cotton/nylon blend yarn and a cable sock of my own design.
Saturday, 3 December 2011
Acrylic Yarn and Thoughts on Sock Heels
I admit it. I'm a yarn snob. I don't really like the feel of most acrylic yarns and I really don't like knitting with most of them. However, recently I was asked to knit a Christmas stocking for a new family member (spouse). The family's existing 4 stockings were acrylic with a Santa head on them.
My commission was to knit another stocking about the same size. I had a little bit of yarn at home that matched the red of the existing stocking but not enough to do much with it but a few rounds so off to the craft big box store I went.
I discovered it is really hard to match the reds of yarn (from the existing stockings) from 25 years ago. Go figure. I found some Vanna's Choice red yarn that was pretty close so I decided to knit the top of the stocking to match the other one and knit the body of the stocking with white (crunchy Red Heart - ugh) using the red for the heel and toe and the Santa hat.
The leg of the stocking is knit flat to accommodate the intarsia of the Santa head. Then the stitches are joined in the round and the rest is knit like a conventional short-row heel sock.
I used my graphing software to graph the Santa head from the original stocking and thought I'd use the exact same pattern for the new one. I had a bit of pink yarn in my acrylic stash (I keep the stash for this exact reason - so I don't have to go out and buy full skeins of acrylic yarn) that I thought I'd use on Santa's face.
Since Santa's pom pom, hat brim and beard are white, I decided to outline them in grey to delineate them from the white of the stocking's background.
I also decided to match the short row heel so I found Priscilla Wild's video on YouTube that didn't use wraps yet didn't have a lot of holes. She does the short rows and just turns, slipping the first stitch of each row. When increasing the stitches again, she knits to the stitch before the 'gap' and knits the next two together, then picks up and knits a stitch from the row below, thus doing the increase and closing any hole there might have been.
The fabric of the original stocking was very dense. I didn't want to knit that tightly with this awful-feeling yarn so I used a 4mm needle. The stocking came out a bit bigger, but that's OK, the stocking that was knit for the other daughter's spouse last year was about 20% bigger and didn't match the Santa heads at all.
Now all I have to do is stitch the grey outlines of the beard, duplicate stitch the name and seam the leg.
I plan to use this heel again! Whilst doing my sock heel research, I watched Cat Bordhi's 'Sweet Tomato Heel' video. I remembered her mentioning it when I took that class with her in October. I would definitely try that heel as well but definitely not with striped yarn as once each heel wedge is completed, you knit all the way around for two rounds. For a reinforced heel I'd use the 'Padded Sweet Tomato Heel'. However, I would modify it by using my preferred 'Eye of Partridge' heel as I like the look of that better than columns of slipped stitches.
I must admit, the feel of the Vanna's Choice yarn was quite nice and was nice to knit with. To me, it felt a lot like Patons Canadiana or Lion Brand Wool Ease. I don't know if it pills a lot with abrasive use but I would definitely consider using it for an afghan that could be machine-washed and only if I could get it for a deeply discounted price.
Yesterday on the GO train on my way into and out of The Big City for a "girls' night out", I finished knitting the faux fringe of the second end of the capybara scarf and completed the 6 plain rows before starting the new capybara chart.
My plan is to knit that entire half, then cut the capybara part out of the first half, pick up the sts above the faux fringe and re-knit using the new graph, then graft it (Kitchener) to the rest of the first half, then graft the two halves together. I think it will work out well so I don't have to completely re-knit the first half.
Speaking of capybaras, I got a message a couple of days ago from someone who writes a capybara blog from the viewpoint of the capybara. She cited and linked my blog to hers. I have since learned that her blog is read by capybaraphiles from all over the world and for a couple of days I received more than twice the number of hits on my blog.
One never knows who might be reading one's blog.
My commission was to knit another stocking about the same size. I had a little bit of yarn at home that matched the red of the existing stocking but not enough to do much with it but a few rounds so off to the craft big box store I went.
I discovered it is really hard to match the reds of yarn (from the existing stockings) from 25 years ago. Go figure. I found some Vanna's Choice red yarn that was pretty close so I decided to knit the top of the stocking to match the other one and knit the body of the stocking with white (crunchy Red Heart - ugh) using the red for the heel and toe and the Santa hat.
The leg of the stocking is knit flat to accommodate the intarsia of the Santa head. Then the stitches are joined in the round and the rest is knit like a conventional short-row heel sock.
I used my graphing software to graph the Santa head from the original stocking and thought I'd use the exact same pattern for the new one. I had a bit of pink yarn in my acrylic stash (I keep the stash for this exact reason - so I don't have to go out and buy full skeins of acrylic yarn) that I thought I'd use on Santa's face.
Since Santa's pom pom, hat brim and beard are white, I decided to outline them in grey to delineate them from the white of the stocking's background.
I also decided to match the short row heel so I found Priscilla Wild's video on YouTube that didn't use wraps yet didn't have a lot of holes. She does the short rows and just turns, slipping the first stitch of each row. When increasing the stitches again, she knits to the stitch before the 'gap' and knits the next two together, then picks up and knits a stitch from the row below, thus doing the increase and closing any hole there might have been.
The fabric of the original stocking was very dense. I didn't want to knit that tightly with this awful-feeling yarn so I used a 4mm needle. The stocking came out a bit bigger, but that's OK, the stocking that was knit for the other daughter's spouse last year was about 20% bigger and didn't match the Santa heads at all.
Now all I have to do is stitch the grey outlines of the beard, duplicate stitch the name and seam the leg.
I plan to use this heel again! Whilst doing my sock heel research, I watched Cat Bordhi's 'Sweet Tomato Heel' video. I remembered her mentioning it when I took that class with her in October. I would definitely try that heel as well but definitely not with striped yarn as once each heel wedge is completed, you knit all the way around for two rounds. For a reinforced heel I'd use the 'Padded Sweet Tomato Heel'. However, I would modify it by using my preferred 'Eye of Partridge' heel as I like the look of that better than columns of slipped stitches.
I must admit, the feel of the Vanna's Choice yarn was quite nice and was nice to knit with. To me, it felt a lot like Patons Canadiana or Lion Brand Wool Ease. I don't know if it pills a lot with abrasive use but I would definitely consider using it for an afghan that could be machine-washed and only if I could get it for a deeply discounted price.
Yesterday on the GO train on my way into and out of The Big City for a "girls' night out", I finished knitting the faux fringe of the second end of the capybara scarf and completed the 6 plain rows before starting the new capybara chart.
My plan is to knit that entire half, then cut the capybara part out of the first half, pick up the sts above the faux fringe and re-knit using the new graph, then graft it (Kitchener) to the rest of the first half, then graft the two halves together. I think it will work out well so I don't have to completely re-knit the first half.
Speaking of capybaras, I got a message a couple of days ago from someone who writes a capybara blog from the viewpoint of the capybara. She cited and linked my blog to hers. I have since learned that her blog is read by capybaraphiles from all over the world and for a couple of days I received more than twice the number of hits on my blog.
One never knows who might be reading one's blog.
Saturday, 26 November 2011
Capybara Scarf Update
I got beyond the capybara design a couple of days ago and rather than tediously knitting both sides at the same time, I decided to put all of the red sts on one needle and all of the black sts on another and then I could just knit a stocking stitch tube.
I quickly realized I had a dilemma. How do I knit the intarsia in the round? I couldn't figure out how to do it without an opening down the side. I figured there had to be a way I could knit a stocking stitch tube with one side in each colour.
At my regular monthly tea house knitting meeting, I asked the proprietor, Cheryl, a very skilled knitter, how to solve my problem. She quickly explained that I needed to put the red sts on one circular needle and the black sts on another. Then at the beginning of every row, I make sure I cross yarns and purl with colour A, then knit across with colour B. Then turn the work, twist the colours and purl with B, then knit with colour A. That way, the yarns get twisted on each side leaving no opening.
I happily began this and knit about 14".
It's coming along, nicely. However, it kinda bugged me that the capybara was distorted and seemed to be squashed vertically. He kinda looks like a hippo and that just won't do. I had an inkling this would happen before I even started the project but was in denial and thought it would magically be the right proportion. So much for magical thinking.
Of course, it's because my grid paper had squares - which would be fine if my stocking stitch is 5 sts and 5 rows - a 1:1 ratio. But my stocking stitch on this project is 5 sts and 8 rows - a 5:8 ratio. In order for the capybara to be proportional, I needed to graph it on assymmetrical graph paper.
Where does one get that? Online, of course. So I 'googled' knitting graph paper and found this website. I had to do a bit of fiddling with the parameters so I could print grid paper the right width to accommodate my capybara diagram. And...I'm having issues with my printer. It keeps not wanting to print unless I shut my computer down and restart it. It's a software problem between it and my computer. Anyway, I'm pretty close to the right size grid paper. I just need to get my printer to print it. Then I can re-graph it with my knitting software.
Anyway, what I'm going to do is start again with the faux fringe and new capybara grid with the same number of stitches per row and same needle size and see how it looks. If it looks better, I'll just cut my knitting above the original capybara, conserving the pile of stocking stitch I've completed and graft it together with the newly knit end. I really do think it'll look a lot better.
Lesson learned? Measure the swatch and make sure your graph paper reflects your knitting ratio.
(a few minutes later)
So now I've printed my proportional graph paper and have traced the capybara outline on it.
And here is my new graph from my software that doesn't print assymmetrical graph paper.
The graph looks wonky but I'm pretty sure the capybara proportions will be more accurate once knit.
Stay tuned ...
I quickly realized I had a dilemma. How do I knit the intarsia in the round? I couldn't figure out how to do it without an opening down the side. I figured there had to be a way I could knit a stocking stitch tube with one side in each colour.
At my regular monthly tea house knitting meeting, I asked the proprietor, Cheryl, a very skilled knitter, how to solve my problem. She quickly explained that I needed to put the red sts on one circular needle and the black sts on another. Then at the beginning of every row, I make sure I cross yarns and purl with colour A, then knit across with colour B. Then turn the work, twist the colours and purl with B, then knit with colour A. That way, the yarns get twisted on each side leaving no opening.
- - - - - - - - - - -
cross yarns on each side --- X X
- - - - - - - - - - -
I happily began this and knit about 14".
It's coming along, nicely. However, it kinda bugged me that the capybara was distorted and seemed to be squashed vertically. He kinda looks like a hippo and that just won't do. I had an inkling this would happen before I even started the project but was in denial and thought it would magically be the right proportion. So much for magical thinking.
Of course, it's because my grid paper had squares - which would be fine if my stocking stitch is 5 sts and 5 rows - a 1:1 ratio. But my stocking stitch on this project is 5 sts and 8 rows - a 5:8 ratio. In order for the capybara to be proportional, I needed to graph it on assymmetrical graph paper.
Where does one get that? Online, of course. So I 'googled' knitting graph paper and found this website. I had to do a bit of fiddling with the parameters so I could print grid paper the right width to accommodate my capybara diagram. And...I'm having issues with my printer. It keeps not wanting to print unless I shut my computer down and restart it. It's a software problem between it and my computer. Anyway, I'm pretty close to the right size grid paper. I just need to get my printer to print it. Then I can re-graph it with my knitting software.
Anyway, what I'm going to do is start again with the faux fringe and new capybara grid with the same number of stitches per row and same needle size and see how it looks. If it looks better, I'll just cut my knitting above the original capybara, conserving the pile of stocking stitch I've completed and graft it together with the newly knit end. I really do think it'll look a lot better.
Lesson learned? Measure the swatch and make sure your graph paper reflects your knitting ratio.
(a few minutes later)
So now I've printed my proportional graph paper and have traced the capybara outline on it.
And here is my new graph from my software that doesn't print assymmetrical graph paper.
The graph looks wonky but I'm pretty sure the capybara proportions will be more accurate once knit.
Stay tuned ...
Thursday, 24 November 2011
Rowan Kidsilk Haze Stripe
What happens when you hand Kaffe Fassett a ball of Rowan Kidsilk Haze yarn? You get Rowan Kidsilk Haze Stripe hand-painted yarn at double the price!Wheeee!
This yarn has just been made available in North America over the past month or so.
The striping is very random. There really isn't a pattern repeat in the whole ball! It does take about half the ball before all of the lovely colours are revealed.
And the yarn is so soft! I didn't really find it to be 'picky' at all. Right now there is only one pattern for this yarn on the Rowan website. The same pattern is on the back of the ball band. I look forward to new patterns for this yarn that are scheduled to be released this month.
I have two more balls of it in two different colourways to plan for.
Subscribe to:
Posts (Atom)