Monday, 27 May 2019

Blogiversary!

Today marks the 12th anniversary of me starting this blog. I started it just before I retired from teaching high school in 2007.
I just checked and it's the 'linen' anniversary. How à propos seeing as I'm a stitcher and all.

This is my 1609th post and I've averaged 134 posts per year. This has mostly turned into a place for me to refer to things I've done in the past 12 years. I use the search window at the right a lot for that purpose.

It seems many crafters have moved on to videos they post on YouTube but I don't think I could be that organized to have everything ready to show and record it without having to do a lot of editing.  It would be kind of fun to see who all is out there that would be interested in what I'm crafting on a regular basis. But I am going to stick with blogging as that is what I find the easiest. I don't mind learning 'new tricks' - I just can't be bothered with the burden of having to post coherent videos on a regular basis.

Back at the beginning of the year I thought I had lost the blog forever when my domain expired and I didn't renew it in time. Honestly, it was like a death in the family - losing 12 years of documentation of my life. But when I went back to using 'blogspot' in my URL, it all came back! Thank goodness! And all I did was uncheck one thing in my settings.

I've been working on 'The Beast'  - what I now call my sock yarn blanket. It's 40" wide and 56" long.
I only have 3 more 'squares' to knit. I was working on one of them (green one on top right) and just now realized I am knitting it in the wrong place. It should go where the right hand 'X' is. On the top left, the arrow is pointing to where I need to stitch the two squares together.
The final two will go where the other to 'X's are.
I then will be selecting a dark, neutral (charcoal?) sock yarn to do the i-cord binding all around the edges like I did with the first sock yarn blanket.
It finished it off nicely.
Today at my Monday morning stitching group I finished the pumpkins and their stems.
The little button fits quite nicely.

If you look closely, you may note that I stitched the wrong colour on some of the 'mortar' between the stones. I will probably pick it out and re-do those stitches.
It's going to look very spiffy once it's in a frame.
I need to remember to do some backstitching around the star in the peak of the house to make it show up a bit better.

Monday, 20 May 2019

BGB Blitz

Last week Jen1, Marilyn, and I had a marathon sewing session (Geri's Academy of Sewing - LOL) at Jen's place making Bionic Gear Bags. This bag is an adaptation of the Sew Together Bag.

Jen and Marilyn's 'homework' was to cut, interface, and label all the pieces beforehand. We set to work and sewed all day with a break for lunch - Marilyn's delicious carrot soup.

Jen was a real keener and in addition to prepping all her pieces, she sewed all the pieces and pockets to the zippers ahead of time.

We set up in Jen's dining room. 

Because Jen had a head start, she was able to finish her bag.
I love the 'bee' theme and the lovely, yellow honeycomb fabric in the zipper pockets.
Marilyn did great for a person fairly new to sewing. This is a very ambitious project and she got the bag all finished except for the long zipper. At one point we thought she had sewn some of the pieces in the wrong order as we couldn't get the side pieces to fit. What a bummer! But Jen took a look at it and realized one of the pieces had just been mistakenly rotated 180 degrees. So we unpicked the stitches, rotated the piece into its correct place, and sewed it back up. Yay! It was an easy fix!
Here are our three bags. I had all my sewing tools in mine to transport them to Jen's. Now when I sew, I have it open right beside me with everything within easy reach.
I helped Marilyn finish the last zipper on her bag.
I like all the primary colours.
It looks pretty spiffy all zipped up.

There was a lot of pressure on them to forge ahead and keep sewing but they did a fantastic job. I'm so impressed at the improvement in both their sewing skills. What a fun and productive day!

Sunday, 12 May 2019

Antique Market Shopping and Cord Keeper

I have the best luck when I go to the antique market looking for a particular thing. Last time I went in search of a dish with openings around the edge to hold my scissors and found it at the first booth I saw.
Today Skip and I went just to get out of the house and I wanted to find a frog, also to hold my scissors beside my chair when I'm stitching. I lucked out! However it wasn't a frog, it was a candlestick with holes around the edge. There was a candle in it but I left it behind.
It's even better than a frog because the holes don't go all the way through so my scissors won't dig into the surface the frog is on.
I'm so pleased I found it.
Then I had the urge to sew. I found a pattern to make a cord keeper to wrap around charging cables. It was free here. I used hook and loop tape (Velcro) on the first one then hauled out my snap tool and put snaps on the other ones I made.

I fussy cut cell phone images from fabric I've had in my stash for a while.
The inside is micro USB and Lightning cable fabric. Then two buttonholes are added to thread one end through so the keeper and the cable stay together when charging.
Then they all roll up and it snaps closed. Easy peasy. So handy for travelling or generally being on the go.
I cranked a few of these out today. One other modification I did was to fuse interfacing to one of the fabrics before sewing them right sides together. I also topstitched all around closing the opening that was left for turning. The original pattern doesn't include either of those steps.

And finally - I knit another Cunningham baby blanket for my friend's second grandchild to be born in the last 10 months (the babies are cousins). The appreciative mamas knew to send a photo with the baby and the knitted item.
Baby Wyn - born July 2018. Wearing Maille cardigan and using a Cunningham blanket.
Wyn's new cousin, June, born last month wrapped in her new Cunningham blanket.
It's so nice to make things for knitworthy people. And what baby doesn't need a handknit superwash blanket?

Saturday, 11 May 2019

Teabag Caddy

Last night I was in the mood to sew something small. I've had the pattern for this teabag/card caddy for quite a while and was reminded of it when we went to Georgetown on our road trip a couple of weeks ago.

I raided my stash for fabric. Basically it's a 9 1/2" x 12 1/2" rectangle (including seam allowances) which is sewn with the right sides together then turned right side out. Then the two ends are folded up 2" and sewn down. I added the hair elastic which I would hook onto a button on the outside.

The dollar store has several colours and thicknesses to choose from. I selected the one with many different colours for my sewing stash.
All sewn together.
It was a pretty quick project - perfect for tucking in your favourite kind of tea when you're on the go.


It could also be used as a business or credit card holder.

I got most of my fat quarters into the Gnedby shelf. There's still room for some half yard/metre cuts.
I am going to have to anchor it to the wall, though as it's starting to want to tip forward.

Friday, 10 May 2019

Order out of Chaos

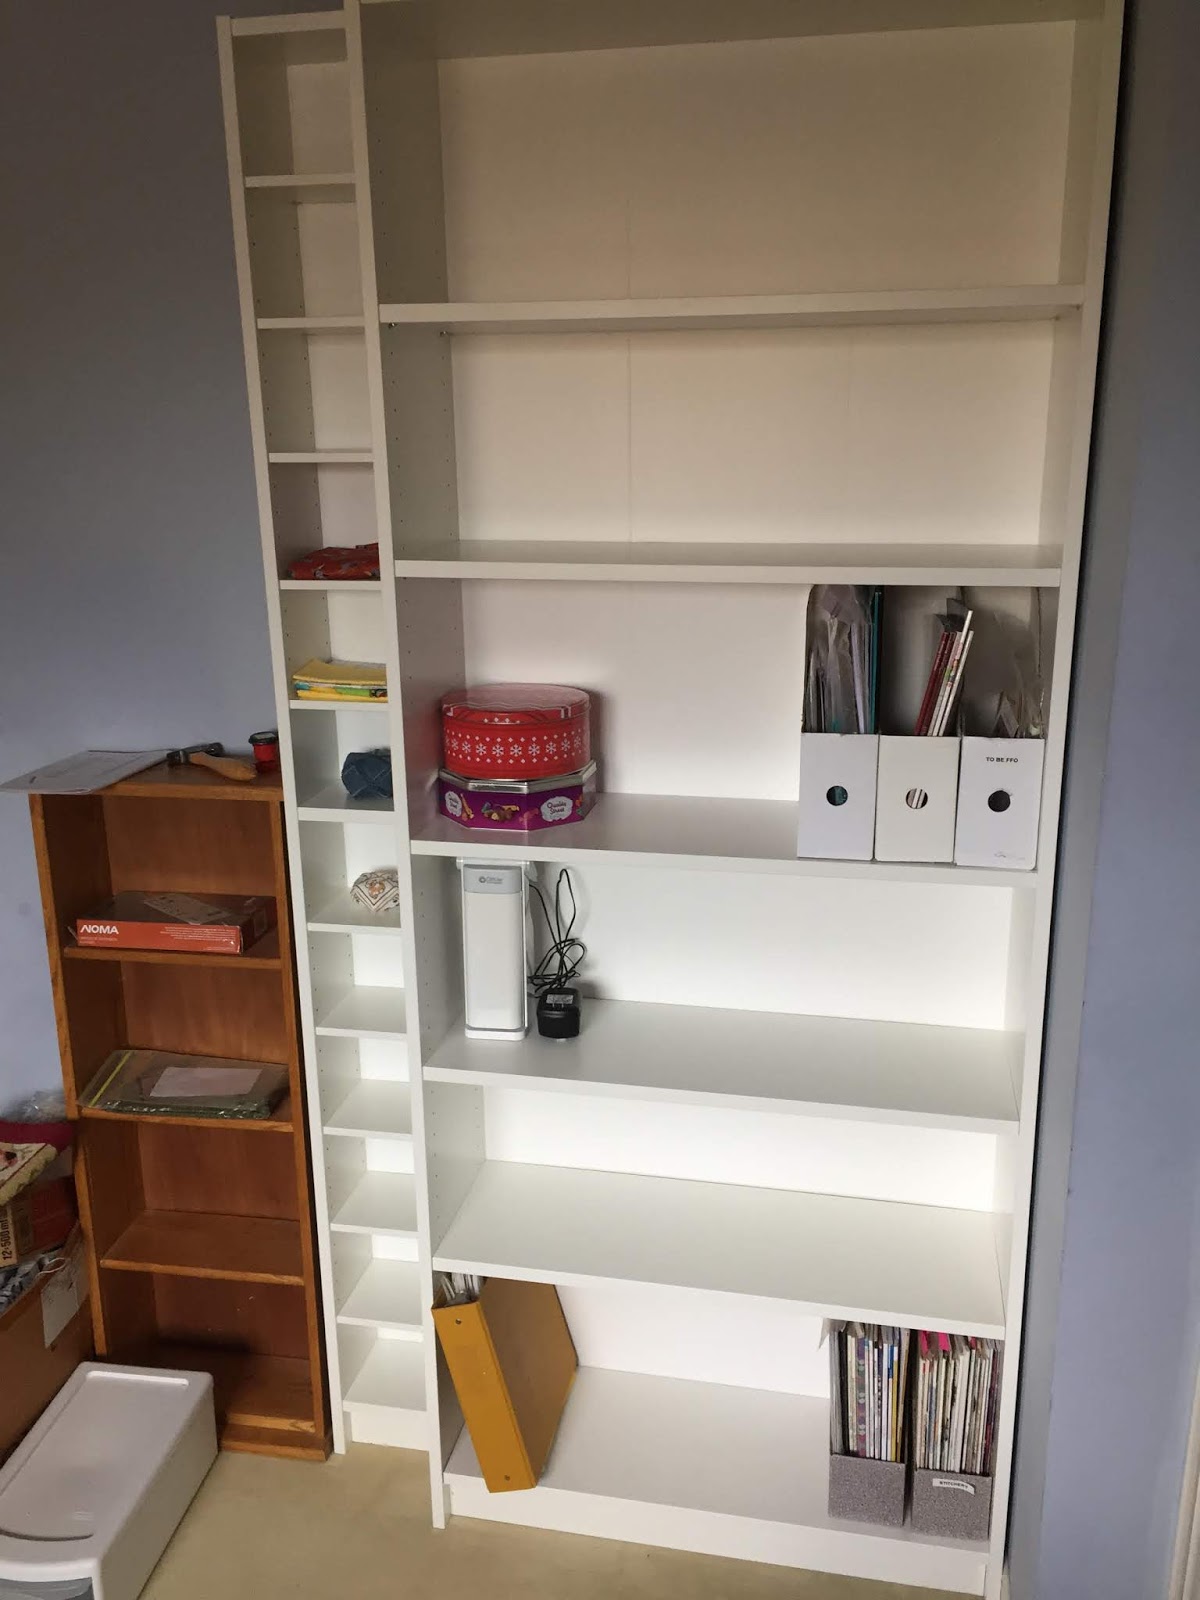
For too many years my office/craft room has had too much furniture and stuff crammed into it. For my birthday, Skip got the 'Got Junk' people to haul out the treadmill and sofabed which finally left room for me to get my stuff organized.

I ordered a Billy book shelf and a Gnedby shelving unit online from IKEA to finally restore some semblance of order. We have a local pick up spot so for only a $20 fee, the items were delivered there and I picked them up on Wednesday. It was SO nice not to have to drive into The Big City to pick them up. And BONUS! I grabbed some Swedish meatballs, gravy, and lingonberry sauce on my way out.

I finally got both shelves assembled and into place yesterday. Now I need to figure out how I'm going to organize things to make optimum used of the space I have. I also need to get rid of a lot of stuff that I haven't been using for a while.
I'm hoping to house my smaller cuts of fabric on the narrower shelving. I just have a concern about the fabric fading in the sunlight so may, at some point, move it to a spot where the sun doesn't directly shine on it.
I've also almost finished Cinnamon Stars. I only used 'fancy floss' on larger elements of the pattern and DMC on the rest.  I really like how the hand dyed thread looks on the front of the house. It would have just looked flat with DMC.
 The sunflowers are very cute.
I'm going to put a couple of pumpkin buttons where some of the stitched pumpkins should go.
Then I'll finish stitching the rest of the pumpkins and I'll be done!

Just looking at the image, I think I need to outline the star on the front of the house with a dark grey so it will stand out a bit better.

Sunday, 5 May 2019

Sewing Marathon

Yesterday Alexa, Dorota, Donna, and I went to the first annual Sunshine Fibre Festival in Severn at the Orillia Agricultural Fairgrounds. It was a cute, little fibre fest where we saw lots of different vendors from what we customarily see down where we live. After lunch we went to Thimbles & Things- a lovely quilt shop in the same area.

All I was looking for there was a zipper to match my measuring tape fabric and they had one. Yay! So yesterday evening I started sewing everything together. Nothing was terribly difficult, but with four zipper pockets, it was just a LOT of sewing.  Why the extra length on the zippers? They can always be trimmed to the desired size. I usually buy 14" or 16" zippers for this reason. Also when they're trimmed down, the metal stoppers get trimmed off so there's no fear of hitting them with the sewing machine needle.
The Sew Together Bag video tutorials were very helpful. Here's the interior with the side bindings in  place.
And a different view. This is as far as I got last night.
All that I had to do this morning was attach the long zipper that closes the whole bag.

And finally...TA DA! The quilting on the exterior shows up well in this photo. With directional fabric, things were a bit more fiddly.  I had to ensure the word 'Stitch' appeared in the correct orientation (click on the photo to 'embiggen')
even on the zipper tabs that are sewn to the bottom binding. I hadn't cut the pieces in the right orientation so I used some creative sewing to make them work.

This thing will hold a LOT of stuff. It's wide enough to accommodate all the tools one could imagine. The tray on the front is handy for grabbing things whilst sewing.
The side view shows how the long zipper is attached.
I'm very happy with how it turned out. I'd love to make another one but maybe not for a while.
 
Some observations/notes:
  • It was very useful to label my pieces with letters and the upward orientation while I was cutting them out.
  • I attached the other side of my binding by machine. I did glue it in place and used Wonder Clips to hold things. I tried to hand stitch first but it didn't go well.
  • I liked how the quilting on the exterior worked out, however one can just use the same light interfacing as on the interior pieces. 
  • If I had used the same colour zipper as the bindings, I wouldn't have had to do as much fiddling to stitch in the ditch when I attached the long zipper binding. I used black thread in the top thread and white for the bobbin thread.
  • Rather than paying a fee to watch the Bionic Gear Bag tutorials on the Sew Like A Rockstar website, save your cash and watch the free Sew Together Bag tutorials on YouTube. The construction of the two bags is very similar. Watch them a few times to get your head around all the steps.
  • Also, save some trees and save the pattern to your iPad rather than printing all 30+ pages. I only printed the one pattern piece that had to be cut out and taped together

Friday, 3 May 2019

Bionic Gear Bag Prep

I started cutting out my pieces for the Bionic Gear Bag. I'm using 6 different fabrics - mostly fat quarters and a couple from 0.5m of fabric.

I'm labeling each piece with its letter name and an arrow pointing to the top of the piece as most of the fabrics are directional. I used a Sharpie on masking tape on the roll, then peeled it off, cut it, then stuck it to the appropriate piece. I was leery about using the Sharpie with the masking tape right on the fabric - in case it bled through. I pinned any duplicate pieces together (i.e. zipper pocket linings 'J', side pieces, etc.)
Here they all are cut out, labeled and ready for the interfacing. I'm using the 'Stitch' fabric for the front tray, bindings, zipper tabs,and zipper pocket interiors. I still have a bit left from the 1/2 metre Jen gave me for my birthday. The fabric that looks like random pattern pieces ('F' and 'I' below) has been in my stash for years and is a good colour match for this project. (excuse the bad lighting)
I discovered that some of my interfacing wasn't fusible so I found the Heat N Bond (TM) in my stash and made it fusible. It didn't really add much extra bulk to the interfacing.

First thing I did was sew the bottoms of the outer two pieces together as this fabric is directional. I then decided to quilt it, attaching it to some batting. Because of the batting, I didn't need to interface the exterior piece 'A'.
I used the 60 degree line on my cutting mat as a guide.
I put a pin in the centre of the centre seam then put the pin on the 60 degree line.  Then used masking tape as a guide for the first line. With the first line done, I stitched another quilt line 2" away. Then did the same in the other direction. It takes a while, uses quite a bit of thread, and narrows the piece a bit, but I like the look of it.

After getting all the pieces interfaced, I thought I'd start sewing the pieces together. It was only then I realized my yellow zipper doesn't match the yellow measuring tape fabric at all.
My progress screeched to a halt. But it was already past bedtime and I have a busy day tomorrow so I quit for the night.

This afternoon I met Barb at St. Mark's Church in Whitby to attend the quilt show. Barb had her first quilt she ever made on display. It looked great.  We admired all the beautiful quilts and voted for the ones we liked in each category. Then we enjoyed our tea and treats which were included in the admission fee.

While we were chatting Barb mentioned that some people in one of her embroidery guilds were making the BGBs and were selling them for $100 plus the cost of the materials. I can see why they'd charge so much. I just spent the last 6 hours cutting out my pieces and interfacing them and have about another 6 hours left to sew them all together. That doesn't even count all the time I spent watching the YouTube videos on the Sew Together bag.

Tomorrow Alexa, Dorota, Donna, and I are going up to the Orillia area for the Sunshine Fibre Festival at the Orillia and District Fairgrounds. I had never heard of it and certainly don't need any more fibre, but it sounded like it would be fun. While in the area, I hope to visit the quilt shop up there - Thimbles & Things. I'm hoping they sell zippers and have one that will go with my measuring tape fabric.

On the way home we may stop into Myrtle Station Wool if any of the gals are interested.

The Ultimate Sewing Centre in Oshawa is having their open house tomorrow where they will be revealing all the course projects for the summer but I don't think I'll make it back in time for that. I'll just check out their web page and possibly pop into the store next week and see what all is offered. I think I'm at the point where I can interpret a pattern and get through a project on my own with help from YouTube videos and any online commentary. However, I could be enticed by an interesting class.