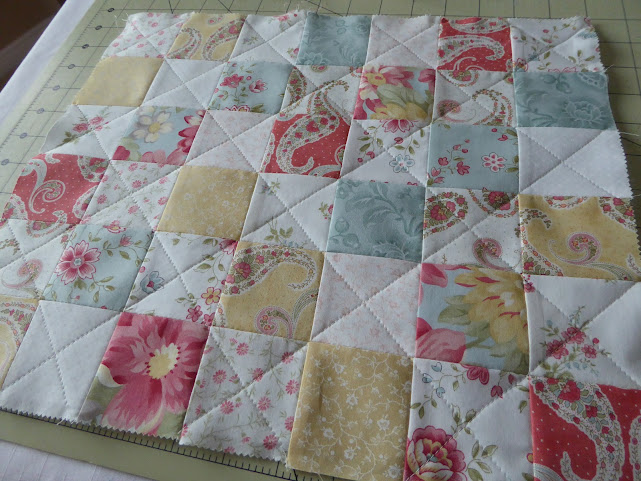
In preparation for making another checkerboard project bag with a vinyl front, I made another quilted checkerboard today. I've outlined this before but here's a refresher about the steps I took for the 7 x 6 checkerboard:
I drew the grid lines 2.5" apart on the glue side of fusible interfacing. I don't worry about the outer squares being completely on the interfacing.
From the Promenade charm pack I took 6 dark and 6 light squares and quartered each 5" charm square into 4 - 2.5" squares.
I then laid the darks out in checkerboard fashion - wrong side of fabric onto the glue side of the gridded interfacing. I always make the bottom 2 outer squares dark ones. Sometimes the fabric orientation is important but not so much with these patterns.
Then I added the light squares in between. In the previous steps, I made sure there were no repeats in each column or row. Then I pressed everything onto the fusible interfacing and double-checked for the last time. Taking a photo and looking at it critically is an easy way to see if there are placement errors.
I then took the rightmost column and folded it right sides together and sewed 1/4"from the folded edge.
Then repeated with the next columns to the left.
Then pressed all the seams in one direction. I then sewed the horizontal rows as I did for the vertical columns. This created beautifully lined-up 2" squares
I then cut the batting slightly smaller than the stitched piece and centred the wrong side of the fabric on the batting, pinning through some of the dark squares. Taking a water-soluble pen, I drew quilting lines diagonally through the light squares.
Using my quilting/walking foot, and a 3mm stitch length, I quilted on the lines. At each edge, I turned the fabric 90° and sewed down the adjacent line. (blue arrows).
I removed the pins, and quilting lines with a damp sponge, then pressed well.
Done! Now I need to find appropriate fabric for the back and zipper bindings.
I found this cute, sunflower ribbon at our new Dollar Tree the other day.
I'm going to make tags to sew into the bindings of my sewed pieces by folding it in half and sewing between the two motifs (red line).
I'm very excited for my day trip to Elim with Jen1 tomorrow. I have my projects and lamp all packed and just need to make my lunch to take with me. I also found out tonight that we don't have to take the bridge repair detour that would add another 20 minutes to our trip each way so there will be that much more time for stitching.


No comments:
Post a Comment