Monday 30 May 2022

Stitching While I Chat

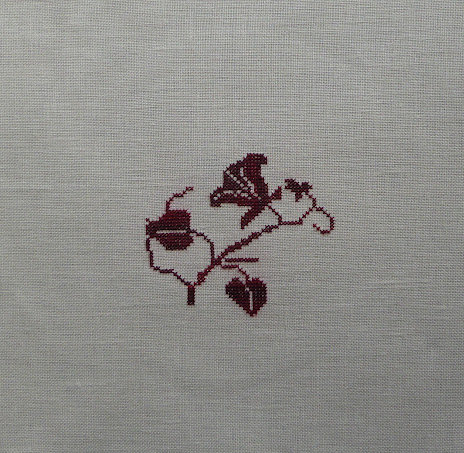
On this morning's Zoom call I did a bit on two projects. I had completed the medallion and the circular border yesterday on the Quaker sampler.

and did the number 8 today. Stitching on 40ct outdoors is a lot easier on the eyes with the natural light than indoors with a lamp.

I also worked on more of the Blackbird Designs "It's Spring Fever".

The colours are a lot brighter in person than in the photo on the pattern cover.
This piece would make a nice French purse/tray. I may even have enough fabric around the border for the sides. More investigation is needed.

Saturday 28 May 2022

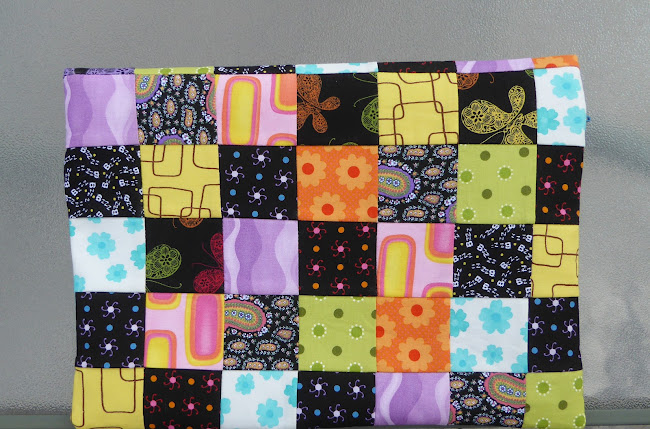
Scrappy Project Bag from A Jelly Roll

I've had a partial jelly roll in my stash for quite a while and got the idea today to cut the 2.5" strips into 2.5" squares and make another project bag.

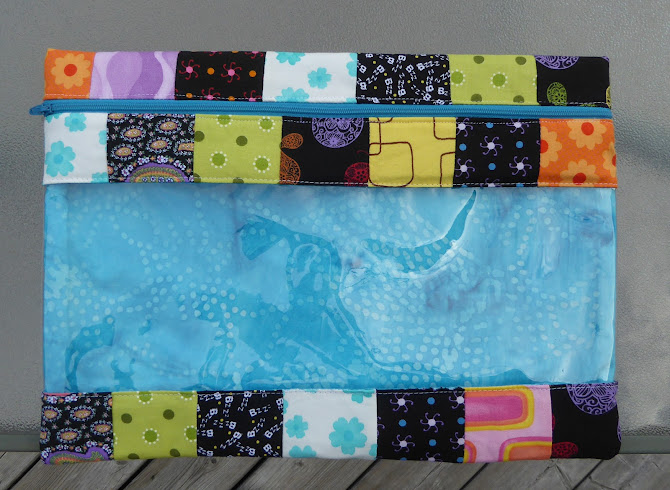
I used the same process as the previous post but made the vinyl window 8" high. I still had to fold the top row of squares over but the final product was 13 1/4" x 12". 

I'm so close to making those project bags that have quilted backs and the front is all vinyl window.

Everything was from my stash - zipper, thread, interfacing, batting, jelly roll, vinyl, lining.
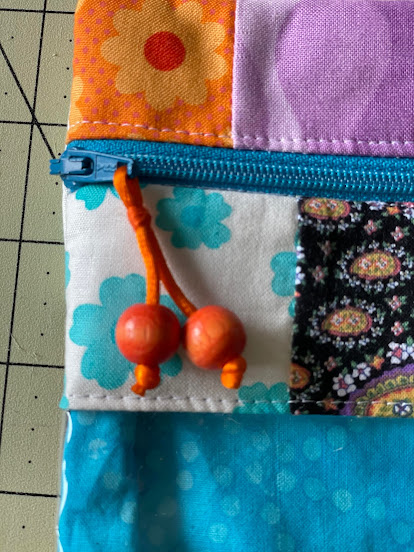
Then I made a zipper pull using some 7-strand beading wire, beads, and supplies I had on hand.
This morning I made a little pincushion using some of the leftover squares from the previous project. I stuffed it with sawdust. It's nice and firm. Now that I've tried this finishing technique, I believe I can finish some little samplers into little pillows. 
I've also got some crushed walnut shells (aka lizard litter) that I could mix with the sawdust.

The weather was gorgeous today so I spent a lot of the afternoon out on the deck stitching en plein air. I got caught up on YouTube videos while I was out there.

I started Willie's Quaker Square 6 on the 40ct Sand linen with my favourite DMC 115. I'm cutting out the bright red bits and saving them and just using the darker shades.

This is going to be a pretty quick stitch. 

I have the sleeves on my cardigan knit halfway. I'm looking forward to joining them to the body and getting the yoke started. I'm using the Starry Night pattern as a guide, combining it with the EZ Percentage method.

Friday 27 May 2022

A Rainy Day and Another Scrappy Squares Project Bag

It was raining this morning so I deemed it a perfect day for sewing another project bag.

This time, I went for a more precise method. I decided to do the math and figure out the correct size for the vinyl window and a bag approximately 14" wide and 12" tall. 

I needed 7 columns squares for the width and 6 rows for the back and three rows for the front - one below the vinyl window, one above, and one row above the zipper for a total of 9 rows. I did them all on the same piece of interfacing and just cut apart the individual rows for the front after sewing all the column seams. I actually had 7 rows on the back as the top row was to fold over and make the top row on the front - above the zipper.

I gridded the fusible interfacing with 2.5" squares. Then cut the 5" squares into 4s, separating lights from darks.

After cutting the 5" squares into quarters, 32 dark squares and 31 light ones, keeping the darks and lights separate, I arranged the darks on the gridded interfacing in a checkerboard fashion, making sure not to repeat a pattern in a row or column. 
Then I did the same with the lights.
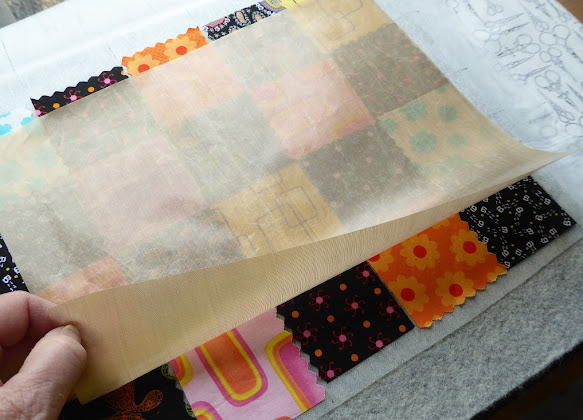
Once I was pleased with the arrangement, I pressed the squares onto the fusible interfacing, using a non-stick pressing sheet.

I think it's probably Teflon (TM) so I'm hoping it doesn't kill me. This way, any glue between the squares didn't stick to the iron.

Next I folded one column over and stitched 1/4" along the folded edge, for all of the column seams.


Then pressed everything with the seams going one way, first from the back, then from the front.

At this point, the top two rows were cut off as they'll be used on the front of the project bag.

Then I sewed all the horizontal row seams as was done for the column seams. Now I could cut the lining to exactly match all the cut pieces. Then cut the batting to fit each piece leaving a 3/8" margin around each piece to reducing the bulk.

Now came time to sew everything together. I checked which rows I wanted where, remembering that the top row of the back was going to fold over.

First I sewed a row of squares and its lining onto the lower edge of the vinyl with right sides together. After opening it out, I topstitched. I did the same with the top edge. Then I sewed the zipper to the top edge of the row of squares above the vinyl. At this stage, I don't attach the lining. Instead, after attaching the zipper to the squares, I press a hem on the lining and pin it to the back of the zipper. The lining will then attach when I topstitch below the zipper. 

Next, I sew the top of the back to the top of the zipper, enclosing the zipper tape between the lining and the squares fabric. I took care to match the seams of the top row of squares to the squares below the zipper. Pressing the seams in the opposite direction allowed me to 'nest' the seams and pin so they'd match up.

Then OPEN THE ZIPPER and fold the lining, right sides together and the squares right sides together, sew the side seams, the bottom seam of the squares fabric and the lining fabric, leaving a 4" - 5" gap in the bottom of the lining for inserting my hand and turning everything right sides out. All of these steps are covered in Kari's video mentioned in the previous post.

The 7th row on the back folded over to make the top row on the front. 

The top fold didn't land perfectly on the seam line. Had I checked that when folding the right sides together to sew the side seams, it could have worked out perfectly. I would have had to trim a bit off the bottom of the bag to compensate for my inaccuracy. Again, I wasn't that concerned about it.
I had an old scrunchie that has a bunch of wooden beads tied with coloured satin cord. I have kept it all these years in case I ever had a use for all those beads. For a zipper pull, I untied the knot on one end, threaded it through the zipper pull, slid the bead back on the end and re-tied the knot. Then with matching DMC 947*, I sewed the satin cord together just below the zipper pull. (Pictured is yesterday's bag).

*again my DMC colour card came in handy.

Thursday 26 May 2022

Random 5" Squares

I've had a couple of packs of 5" squares in my stash for years. I got them on sale at Mary Maxim and thought I'd use them for a pattern requiring that size. And so they sat.

The other day I saw a Tiger Lily Designs video on FlossTube where Kari made a rainbow patchwork project bag using 2.5" squares. She used featherweight iron on interfacing that had been gridded with 2.5" lines and arranged the squares on it. Then she ironed the squares to the interfacing. Check out the video for the rest of the steps she followed.

I don't have 2.5" squares but I do have 5" squares that can easily be cut into 2.5" squares so I went to work.

I didn't bother gridding the interfacing. I probably should have but I'm OK with my prototype being a little wonky. I wanted my finished project bag to be about 14" by 11" or so. I wanted one strip of squares below the vinyl window and one strip above it. Then the zipper. That made 7 squares across 6 high plus one above the vinyl and one below the vinyl = 56 squares - with 7 across and 8 vertical. 

Once I had the outer patchwork all put together, I found a coordinating turquoise fabric and zipper in my stash and started sewing everything together. 

My imprecision made for a slightly wonky project bag. The squares above and below don't line up but it is padded with batting, measures 14" x 10" and will accommodate a pattern on 8.5" x 11" paper and all the accessories for a project. 


I should have made the vinyl window at least 1.5" bigger,  or run an extra row of patchwork for the back. The top row was supposed to fold over in the centre but because the vinyl wasn't big enough, a whole row folded over from the back. Oh well. Next time. In the meantime I have a new bag.
This month marks one year since Skip had his big surgery (a rare type of skin cancer). Today we went into The Big City for his checkup. We've been going in every 3 months. He has healed very well and seems to be cancer free. His next appointment is in 6 months. So we get to live freely (within reason - COVID considered) for 6 more months. This appointment was weighing heavily on Skip's mind and I was actively shoving it to the back of mine. I'm not one to spend a lot of time fretting as it serves no purpose but I am ready to spring into action as the need arises. We both were very relieved when the doctors gave him the all clear today.

For the first time in years, we didn't have to board our GO Train back to Whitby in the hinterland on Track 26. They've finally finished the work on the tracks closer to the station so we got to board at tracks 10 and 11. 

So when I got home, my release of stress was to make the project bag. 

I just realized that tomorrow is my 15th Blogaversary! I started documenting my shenanigans, crafty and otherwise on May 27, 2007, shortly before I retired from a 30 high school teaching career (Music and Math mostly). I'm so glad I've kept up this pictorial journal as I refer to it frequently when I want to know what and when I've done stuff in the past. That 'Search This Blog' window on the top right has come in so handy.

Wednesday 25 May 2022

Two At A Time Sleeves

In order to do the same colour changes and increases on both sleeves, I'm doing them at the same time. I'm also knitting them in the round - two fewer seams to sew up. I don't mind sewing up seams, I find zipping a seam together with mattress stitch to be very satisfying, but it's just easier to knit in the round.

As I used my Starry Night sweater pattern as a size guide, I also used the number of cast on stitches a guide, both for the body and then the sleeves. As this project has fewer sts per inch, I cast on proportionately fewer sts. 

As I mentioned in the previous post, I measured 1" back from the first coloured stripe (orange) and used the light blue as the first colour after the sleeve cuffs. The sleeves are 1" longer than the body so when I get to joining the sleeves to the body, they should all have the same colour stripe across the entire yoke. At least that is the plan.

Knitting two at a time (TAAT) is fiddly to start. I've only knit a couple of pairs of socks that way and it's not my preferred method. However once I got the sleeves underway it wasn't that tricky. I carry the main colour up and do the colour changes along the underarm seam. I'm not only weaving in the contrasting colour ends as I go, I also try to weave in the beginning of the new colour a few sts back. This will save me a lot of sewing in ends when I'm done. There is a definite 'jog' at the underarm seam but it won't be very visible as it will be under the arm, of course.

With the contrasting  yarn, I use the inside strand of the ball on the first sleeve and the outer strand on the outer sleeve.

I did add 5 stitches after the ribbing on the cuff and am increasing at the beginning and end of every 5th round. My finger knitting counter is a big help.
Stock photo

Increase rounds: K1, m1, knit to last st, m1, k1.

I will be doing some therapeutic knitting today since hearing about the mass shooting in Uvalde TX. I've already some 'bad moments' today so won't dwell further. Thoughts and prayers just don't cut it any more.

I'm looking forward to my regular Zoom visit with my stitching peeps this afternoon.

Tuesday 24 May 2022

Time To Start the Sleeves

I finished the body of the scrappy sweater last night. Actually, I knit one round too far and had to tink back.

I used measurements from a favourite sweater - 15" to the underarms for the body, 16" to the underarms for the sleeves.

I want to maintain the striping sequence so that when I join the sleeves and body, it's the same colour stripe all the way around the yoke. That means I need to start the striping a colour 1" below the golden yellow colour. The sleeve cuffs will have the same ribbing as the bottom of the sweater. 

There is a lot of calculating but just taking things one step at a time seems to help keep my brain from overloading.

This afternoon I will finish all the stitching on the Wessex Hussif. Fabric selection for the interior continues. I'll probably use a very neutral white fabric.

Monday 23 May 2022

Just About Finished

I have spent quite a bit of time these last few weeks on the Wessex Hussif. I have used almost two complete spools of white Sulky Petites thread. I thought I was going to finish the second spool and have to start a third one (not sure where it is right now) but there are still few metres of thread left on #2.

I took the piece outside to take photos. The sun was blinding so I couldn't see well enough to take good shots but here it is.

I did the diamond part around the bottom yesterday. It went fairly quickly and didn't use as much thread as I thought. The big diamond in the bottom right is where my initial(s) will go but I'm searching for the right font as what was given in the pattern doesn't work well with this thread over 1.
During my Zoom chat this morning, I filled in all the space in the top (where you don't see the blue and yellow 'x's) with white long-tail chain sts. It was originally left empty for a little verse but I couldn't make the stitching work.
I can quickly fill in the blue and yellow bits. Then all the stitching will be done.
The triangle on the right - basically couched threads - is not my favourite-looking stitch. It was fairly easy to do but just lacks something. 
The stitching measures almost 18 1/2" long 
and 7" wide.
The finishing instructions seem quite good. I may add a zipper to one of the pockets and still need to find an appropriate fabric for the interior.

As I was stitching this well into the late evening last night, I didn't do any more stitching on my sweater.

Sunday 22 May 2022

Hurricane Force Winds

We had a big storm yesterday with high winds - well over 100 kph at times. It was considered a Level I hurricane in some areas. It reminded me of a hurricane I lived through as a child while living in Mexico with my family. It was too noisy to sleep so I sat up most of the night with my mom, watching the horizontal rain, green with shredded vegetation.  I don't remember feeling afraid as my parents remained calm and our house was solidly built with bricks and concrete. The only damage we sustained was some broken windows which enabled the entry of rain. The storm petered out a couple of days later as it moved inland. I remember my dad and our maid squeegeing water out the front door. Fortunately all our floors were waterproof terrazo so no permanent damage was done.

Yesterday's storm reminded me of that but it was much shorter - only a few minutes - and although the rain was horizontal at times, it wasn't green. We didn't get the hail that some other areas did. Our power and phone lines are buried in this neighbourhood so the falling limbs from trees as old as 40 years didn't cause any damage that way. Our power only flickered but we never lost it completely.

After the storm, when the rain stopped and the sun came out, I went to a nearby grocery store. The power was out but they were still admitting shoppers. Only emergency lights were on and it was pretty dark - it felt somewhat dystopian. All the refrigeration cases were covered either with wet cloths or plastic so it was hard to see what I was looking for. I did find most things and was able to check out - the registers and cash terminals were working, of course. The other store I went to was not in a power outage area.

At home, we have a gas range and barbecue with a side burner so if we lost power for any length of time, we'd still be able to heat up stuff. As I write this, several of my friends in our region are still without power almost 24 hours later and one town, Uxbridge ON, has declared a state of emergency.

We are grateful for our water-tight, cozy home.

Last night I watched 'Operation Mincemeat' on Netflix. I do have a thing for Colin Firth, after all. I got quite a bit done on my scrappy handspun sweater. I'm more than halfway to the underarm - 16" from the bottom edge.

I don't have enough of the main colour so about halfway through the ball.The handspun I mentioned in the previous post was too thin so I switched to another bunch (left).  It's not plied as tightly but is almost the same colour as the one on the right and I have three hanks of it which should allow me to complete the sweater.
The rest of the first main colour will be used on the sleeves which will be knit cuff up, then  joined with the body. Then the yoke is knit to the neck, continuing alternating with the other colours in the same sequence. The nubbly texture will smooth out a bit with blocking but will never be as smooth as mill-spun yarn. 
The fabric is so soft and squishy. It's going to be so light and cozy.

I started a Wildflower Hearts scissor case with the mystery silk thread and was not pleased with the coverage I was getting with the single strand in the filigree part. I have abandoned that project and will use the fabric for something else.

Oh yeah, I learned how to do something new from YouTube the other day - how to change the batteries in watches. I had two watches that were dead and Skip had a favourite watch that needed a new battery. He's owned it for over 40 years. It's analog and has big readouts for the day and time. Once I figured out how to remove the backs (kitchen knife under the right spot), 

the correct battery numbers were determined and I ordered them on Amazon (between $3 and $6 each) as well as watchmaker's tweezers. They arrived within two days. We already owned the teeny weeny screwdrivers. My 30+ year-old Armitron Peanuts Gang watch is ticking again as is Skip's old Seiko.
Not sure when I'll wear it, though, as I'm quite attached to my Apple Watch 6.

It always amazes me what one can learn on YouTube.

Saturday 21 May 2022

Blue Stripey Socka Socks and More Stripes

I only had the last few rounds to knit on the toe of the second sock and got them done yesterday. To recap, the yarn is Fortissima Socka Color yarn from Schoeller+Stahl in the 121-Marine Colorway.

The striping is very random.
I didn't even  try to create identical twins.
I did continue the Eye of Partridge (EOP) heel pattern on the bottom of the heel as that's what wears out on the socks I wear.
Here's the pattern for EOP used on the heel flap:
Row 1: (Right Side) (Sl 1, K1), repeat to last stitch, K1. Turn.
Row 2: (Wrong Side) Sl 1, purl to end. Turn.
Row 3: Sl 1, (Sl 1, K1), repeat to last stitch, K1. Turn.
Row 4: Repeat Row 2.

This is basically a staggered slip stitch pattern. It provides an extra layer of yarn for extra durability.

I have continued working on the scrappy striped sweater. I don't have an infinite amount of the main colour but have a 616yd skein of turquoise/blue/purple yarn I can use when the original main colour runs out. I've been hoarding this since 2012! Time to let it go.
Here is where I am so far. I knit two rounds of main colour (see ribbing) then alternate with one of the other colours. Now that I'm back with the gold yarn, I'm repeating the sequence.
It's really easy knitting for when I'm watching TV. The body will be about 16" long from the bottom to the underarm.
I must say, knitting with this luxurious yarn is a very pleasant experience. The overall appearance will be somewhat bouclé-ish due to the inconsistency in my spinning and plying. That will be part of its charm.

Friday 20 May 2022

Another Hussif Section Completed

Yesterday I finished the long-tail chain star section (left triangle).

There are two complete sections left to do and then I need to decide how I will modify and complete the top section.

I didn't like how the called-for lettering looked when I stitched it with the Sulky and still need to determine something else to go in there.

I started an Elizabeth Zimmermann seamless Percentage System sweater last night with my handspun. As usual, I started a sleeve and determined my gauge, then calculated the key number (K), which is the desired bust size plus positive ease multiplied by the number of sts per inch.


The other measurements, cuff, yoke, underarm sts, neck opening, are based on this number. Any yarn can be used as long as the correct key number is determined. I'm using a bunch of my beautiful handspun but will need to knit it in a scrappy way as I don't have a sweater quantity of any one colourway. So far I have decided to alternate colours every second round.

I started the body and got the ribbing done. 

I'm still deciding whether to increase stitches after the ribbing. EZ suggests casting on 90% of the K sts then increasing evenly to 100% after the ribbing. I didn't want the ribbing to pull in a lot so basically I cast on 100%, but I'm at the point where I could add more sts. Another thing I could have done is cast on 100% of sts with a smaller needle and then just switch to a larger needle for the stocking stitch. So many decisions to make when creating one's own design.

What? Geri's knitting a pullover sweater??? Yes and no. I do plan to cardiganize it once the yoke is done so I have added 5 stocking stitch steek sts (try to say that 5 times quickly) which will be at the centre front. I will also make all the colour changes there do when I cut the steek after anchoring the sts with my sewing machine (some of the yarns I'm using is non-felting superwash) all the ends will be snipped as well with hardly any ends to weave in.

When I do the sleeves, I will knit them in the round, two at a time with the outer strand of the yarn on one sleeve and the inner strand of the same colour on the other. Just like Two At A Time socks. As scrappy as they will be, I still have a desire to have the sleeves match each other somewhat. 

Another project I would like to have completed by next Wednesday (our May Trillium Guild meeting) is another Wildflower Hearts piece stitched up with the new mystery silk floss I purchased at Kimat Designs. I want to make sure the entire project can be completed with only one skein. I'm planning a guild project for the fall and one of the pieces that can be used for it can be the Wildflowers Hearts pattern. 

I did this one with Sulky threads - one strand for all of it.

I had this much Sulky Petites left on the spool. All that satin stitch used a lot of thread.


When using regular 6-strand floss, I use one strand for all the 'filigree' back stitches and two strands for the Rhodes hearts, circles, squares, and satin stitch borders.


Also on my 'to do' list is to frame my Token of Fall and make a project bag with the Drawn Thread 'Simply Summer' sampler.

I have a couple of projects kitted up that I could start any time. 

Last night Skip, David, Susan, and I attended a showing of "Peace by Chocolate" at our local theatre. Aside from the 4 of us, there was only one other person in the theatre. It made for very comfortable, mask-free viewing. We went for dinner afterwards at State and Main and were able to dine outdoors. The patio was pretty crowded but being outdoors made it more comfortable for us. It was our first movie and dinner out since 'before times'. Plans are shaping up for other outdoor and far-flung activities. This is very good for my mental health.

And my biggest news this week... several months ago, I contacted a relatively local, relatively new stitchery designer offering my services as a model stitcher for her burgeoning business. I didn't hear anything back so put it out of my mind. This week, she messaged me back asking if I'm still interested in stitching models for her and have worked out an agreement. She has a series coming out at Market next March and is stitching each individual one herself to check pattern and colour accuracy. She would like me to stitch them as one large piece which can be used for display at trade shows. 

Speaking of model stitching, the other day I watched Teresa Kogut's FlossTube about a retreat she recently attended and was so pleased to see some of the models I have stitched for her still being used in her pop up shop.

'Heaven and Nature'
'Above All'
'Hazel's Halloween Friends'

But right now I need to sign off and get some housework done.