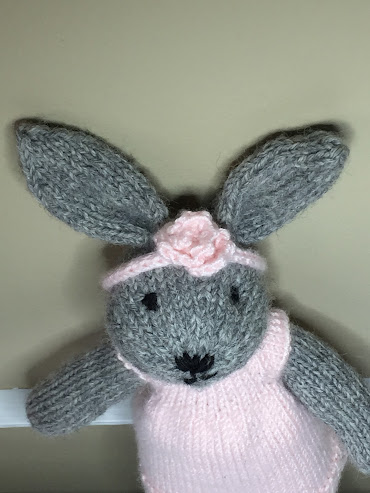
Since I knit the bunny the other day, I've been obsessed with making her clothes. It started out with the dress and hair bow that came with the pattern.
Then I knit her a capelet and a little dotty dress.I embellished the capelet with a couple of HotFix 'jewels' and some 3mm satin ribbon for ties.
And the capelet coordinates nicely. It's knit with some sparkly white mohair blend yarn I had in my stash.
That term is sometimes used for other hard candies. But I digress...
Then I knit a little white eyelet dress.
I think she needs a purse and maybe some shoes. While on my chat yesterday, I finished stitching a humbug and got one of the ends sewn up. I forgot to get a photo when it was just a flat piece but Jean Farish offers the pattern for free on her website.
What's a humbug, you say? A humbug is a hard candy that is rolled out and cut into pieces with scissors.
Jen1 gave me this beautiful skein of hand-painted silk floss quite a while ago. It was perfect for this project.
I have the first end sewn up with beads every other stitch. I had the presence of mind to label beads I had leftover from previous projects and had no trouble selecting these Mill Hill Grasshopper beads for this project. (over-lit photos to follow)I couldn't sew up the other end right away because I hadn't made the corded hanger. I'm still debating whether I'll use the silk thread or substitute DMC in one of the colours.These are the other two sides of the humbug ready to stitch up. The pattern allows for the stitcher's initials to be placed on either side of the side seam.
One modification I made was to make the backstitching only 4 sts away from the design rather than 7 called-for in the pattern. The finished size will be 2 1/8" x 2 1/2".
Jean gives good instructions on how to stitch this 'overshot' pattern by going diagonally. She outlines that in this YouTube video starting about 8 minutes in.
I just realized I forgot to iron some interfacing on the back of the stitching before starting to sew it up. Oh well. It shouldn't make that much difference as the stuffing I'll use is white.
This is a great little project for using up scraps of floss, variegated floss, floss samples, etc. The hearts and the backstitched border could even be moved closer to make a proportionately smaller humbug. You could also easily design your own with whatever motif you choose.
If you like the overshot look, you could always design your own larger piece using the outline of the object and filling it in with the overshot pattern like she did in her Weather Vane Horse design back in 1982.


No comments:
Post a Comment