I'm planning another project bag with the checkerboard layout. I selected 4 dark-ish and 4 light-ish jelly roll strips from the Kaffe Fassett Free Spirit jelly roll in my stash. Two bags can be made with these 8 (or more) strips. More dark and light strips make it easier for the layout but a minimum of 4 of each like this will work. The width of a fat quarter will work for this, too.
The other night, while watching TV, I gridded a piece of featherweight interfacing with 2 1/2" squares - 7 wide and 9 high with a heat-erasable pen. The top bottom and sides don't need to be complete squares as the interfacing will be just a way to baste them all together.
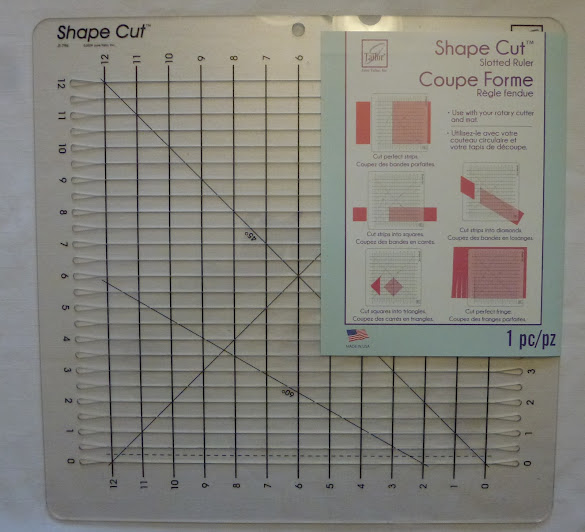
I then stacked the 4 light-ish strips and lined them up under my new Shape Cut cutting template. It has 1/2" slots - great for cutting 2 1/2" squares from jelly rolls. I bought this on my last road trip to the US and today was the first time I used it. I trimmed off the pinked edge on the left aligning the left with 0, I then cut at the 2 1/2", 5", 7 1/2", and 10" slots. Then realigned the rest of the stack and cut the rest for a total of 8 stacks of squares. 8 stacks x 2 1/2" = 20" so more than half the strips remained intact. If you don't have the fancy schmancy template, just cut 2 1/2" squares the usual way.With the fusible side of the interfacing face up, I began laying out the dark squares in a checkerboard fashion then filled in with the light squares. This is where the puzzle comes in. There will be all 4 dark fabrics in one row and only 3 in the next. Another consideration is to try not to have two of the same touching at their corners. So far so good.
Then, press into place using a pressing sheet
so the glue doesn't stick to the iron. Take care not to press beyond these fabrics so as not to erase the grid lines on the interfacing above.
Add the next two rows up (shown here below the horizontal line). Try to not duplicate a square vertically either. Here, the dotted squares are in the same column. I will figure out where to switch them. How do I do that? Just peel the square off the interfacing, relocate it, and press it in place again.
Anything below the horizontal line will be the back of the project bag. Above that line will be the three rows on the front above and below the zipper and below the vinyl window. Don't worry about duplicates between the top three and the bottom six rows as they're be on different sides of the bag.
One solution is to swap the two indicated by the arrows below. The result will have two of the same corners touching but I think it will look better than two the same vertically.
I think this will be it.
Press again. Now I'm ready to begin sewing.
I'll fold a column (vertically) face to face with the one next to it and sew with 1/4" seam allowance from the fold in the interfacing. Then do the same with the next 5 columns.
Now cut the top 3 rows away, one at a time, from the bottom 6 and set them aside.
Taking the larger piece, fold the top row (horizontally) face to face with the one below and sew the 1/4" seam from the fold of the interfacing as you did with the columns. Do this 4 more times and your 7 x 6 piece will be complete with 'perfect' 2" squares. Isn't that easier than trying to chain piece 32 pairs of squares then sew them together etc. etc.? That completes the back piece. After pressing everything firmly, you'll cut and fuse the fusible batting (cut at least 3/8" smaller on all sides) and fuse to the 4 pieces - 3 strips and big piece.
Complete the project bag with the usual procedure.
I explain it in further detail here.
The remains of the jelly roll strips can make a second bag.


No comments:
Post a Comment